

Saturday, September 26, 2009
Books in my head
Monday, September 21, 2009
Rusting Technique

This is not my favorite style, I am just now a western kinda gal :)) but the theme for our shoebox project at my local stamping club last Friday was fall. The only fall saying I had was kinda western so there ya go. The real reason I am sharing this card is the rusting technique I used to make the oval sayings plaque. Some time back I had purchased some metal ovals that I loved. After using them up and not being able to find them again I decided I could make some. I punched mine from matt board then I used a brown marker on the edge but they really look like metal.

Tuesday, September 15, 2009
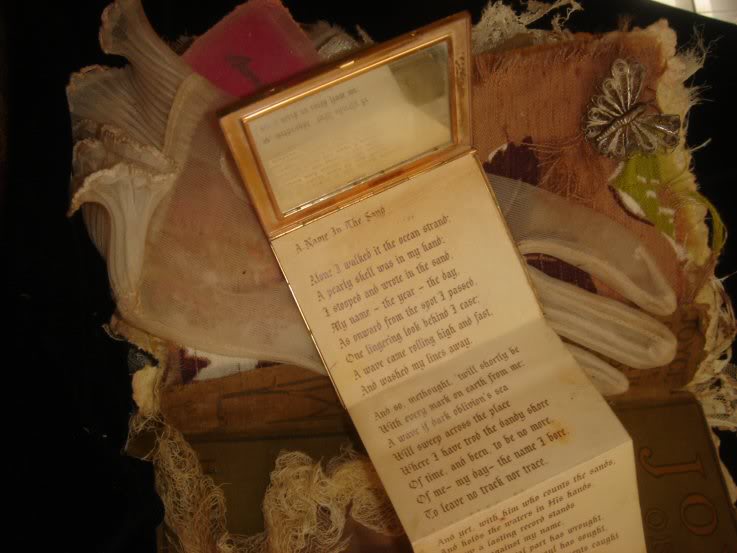
Keeper Of Fragments
I have been busy on my book … I did a little aging on the pages I showed before and I have added a couple more pages. I deleted some the old posts so I could add the updated photos and put everything so far in one spot.


The lullaby page has been aged. I added the rolled up lullaby's in the pocket, and the cherub. The little butterfly pin has been replaced with the little stork pin I found in California. I still need to add some wording above the little picture of me as a baby. I think it needs to go along with the lullaby theme. Any suggestions would be greatly appreciated.

This is also a picture of me as a toddler. I just love the old Sears ad for teddy bears! It has also been aged a little and the other side is now finished. I traced a baby shoe onto leather and cut it out. Then I stitched it and aged it to look like the sole of an old shoe. I even used my dremel to make it look as though a little foot had worn its imprint into the leather.


This is the wedding page. It features a picture of hubby and I. The little velum envelope has a marriage certificate in it. A reproduction antique of course with our real names but the witnesses are my Grandparents who are no longer with us.

This page is a tribute to love, a promise to be forever true and to always remember.

The back of the book :)
Monday, September 7, 2009
I'M HOME!
I finally made it home last week but it has been crazy week. I had so much to get caught up on but I will soon be creating again :)
Friday, August 21, 2009
Still in California!!

When I left for California on the 3rd I had hoped to be gone a little over a week but I am still here! My mom is doing much better although it was a very close call a couple of times. After spending hour upon hours at the hospital I finally decided that she was well enough for us to take some time away and I took my grand baby to the beach in Cambria. It is the town I spent my childhood so it was really special to be able to share that with my little Quinton. I would have posted an update sooner but my sisters computer is a dinosaur and it has the slowest internet connection that ever existed. It doesn’t have a port for my camera chip but I finally got to Wal-Mart and had my pictures put onto a CD.
Sunday, July 26, 2009
Where Bloggers Create

On Thursday, Karen of My Lovely Desert Cottage invited bloggers to join her blog party showing the places where we create. I really wish I had heard about it on time. I had so much fun going down the list and discovering such great storage ideas I felt I needed to give back so although I am two days late I thought I would post a few pictures anyway. So stop by her blog and also check the posts about her room. There were a lot of late comers that have posted pictures on their blogs that are not on the list :)
There is a couple of pictures taken a while back. My studio is not always so neat and right now I have a couple of projects I am working on spread all over my work surfaces. This first one is me in the left side of my studio.

This is my work table and I am facing it in the picture above.

Hubby built my work table and it features a pull out storage for my inks and findings, He even put the acrylic ink shelf on a swivel so that I can access an additional acrylic shelf behind that one. Then it rolls under the table to hide away when not in use.

The other end has a door that opens to hold my scissors and gripper punches and a set of thin drawers.

In the center I have a pull out cart that holds my stamps on acrylic shelf’s. It is made from an old TV stand found at the thrift shop. This is a picture of my acrylic stamp shelf’s when they were in the bar... we just moved them to the cart and I like it much better. Also now next to the stamps I have a roll out trash can.

In the center of the room is my desk.

It is really just a sheet of plywood held up by two bookcases and a piece of tempered glass on top. The bookcase under the desk is where I keep my computer, printer and all that junk. The bookcase on the other end holds my books, magazines, my bottle collection and embellishments I use in my art.

I use to have a bamboo blind across the entire backside but since I closed Inka Stamps I have opened a kick area and a pull out shelf to hold my laptop. Now hubby has a place to sit and visit while we play around on the internet.

Just behind his chair is my soldering station. This is an old picture when I just used it for storage but now there is a pull out shelf that has my soldering iron and tools on it. Also now that there is no Inka Stamps the shelfs behind the roman blinds are just used for storage.

This is the top of the soldering station now. Hubby wired it with a surge protector to turn the soldering iron off and on with. The little lamp you see in the picture is also plugged into the surge protector. This way if the lamp is on I know the soldering iron is on also. This really helps me not to forget to turn it off.. something I am good at :))

This is a close up of my bling and also some more jarred embellishments.

This is an old picture but across the room from that is my cupboard that I store all my fabric, ribbon and so on in. I did a post in the past about how hubby put this together for me.

I now store all my rusty art embellishments on top as well as show off some of the beautiful art I have done and received.


I use to have a plastic bin that I would throw all my paper scraps in. It was a jumbled mess and I could never find what I wanted. So I bought two of those plastic according files and removed the plastic covers. Then I covered a gift box with newspaper and placed the according part in it. Then I organized the scraps by color. Putting all the solid color scraps in the first section and textured and printed in the second according section. Matt board scraps on one end and transparencies on the other. Now I can find what I need without spending twenty minutes going though scraps.

Friday, July 24, 2009
Be back soon :)
I know it seems as if I fell off the face of the earth and I want to thank everyone who has emailed with their concern. I am so sorry it has been so long since I have posted. I have been struggling with health issues since I closed Inka Stamps but I should be getting back to my art and able to keep up with my blog soon :)
Saturday, March 28, 2009
Isn’t it Romantic .··-.¸.-··.¸.··-.¸.-·

Thursday, March 26, 2009
Timeless Words II

Wednesday, March 25, 2009
Confessions of a BLURKER : /

Monday, March 23, 2009
Tricked out :)

I had made several of these pendants last week. I offered one as blog candy and sent several to friends too. My first thought was just to put them on a black neck cord so I called them finished but when I went to put mine together I jazzed it up a little. I had second thoughts about posting this because I worried that the people I sent them to would feel that I sent them an unfinished piece. After thinking about it though, I decided that everyone I sent to were very creative people in there own right. They might even decide to trick out there little pendant better than I have done. It can be like a creative challenge :)) anyway this is what I ended up with for mine :)
Wednesday, March 18, 2009
Amazing Mail!

Monday, March 16, 2009
Picturesque Soldered Charm

Sunday, March 15, 2009
I got waxed!

Playing with acetate

Charms, charms and more charms :)

These are a few sets of charms that I did for a charm swap in one of the yahoo groups I belong to. My categories were fabric, metal and found objects. The fabric ones are sewn houses that I stamped with newsprint. Then I did a fabric transfer of a little fairy and cut her out and the jewel flowers are fingernail charms. I used the Omni Gel medium for the first time and I have to say it came out clearer than any other transfer medium I have tired. Sometimes I want the tattered look but sometimes I do want it clear as for this project. The little house charms measure about an inch high.

I tried to do metal etching for the metals category but it was an dismal failure : / I will have to have more practice for that. I ended up using store bought blanks that I put embossed foil on one side. The other side has vintage text from an old book and a metal letter on top of that. The text I used is a foreign language to me, I used it because the text was small and I liked the look of it. I have been told that it is not offensive and I sure hope so. It was used as an artistic element and not intend to imply anything :)

For my found objects charms I used tiny hinges and made a tablet from the same book that the text for the metal charms came from so again... I don't know what they say :)) They measure also not quite an inch high.
Saturday, March 7, 2009
Peek-A-Boo Eggs!

Thursday, February 26, 2009
Photographic


Anyway it is quite a bit bigger than a real matchbook. The pages were just the right height for the ATC size frames on my new collage sheet but it was too wide…. being the butcher that I am, I got out my xacto knife and cut it a little narrower. Thank goodness she had left the staples in from the edge just enough. I am still getting this ageing thing down so I tried a bit of everything …lol.
I started by stippling the entire thing, then I drizzled ink on it. It still did not look to old so I took the sandpaper to it and roughed it up with the edge of a serrated knife. Better but not quite so next I used some gray, brown and black chalk. Once I had that done I cut the little frames out and placed an acetate window in each. Then came the fun stuff, I added cut out collage images, stamped and embellished to my hearts content :))
Thursday, February 19, 2009
Theme Thursday ...Labels :)

Tuesday, February 17, 2009
ATC’s 4 Trade :)
I was looking at my ATC book the other day with a friend and I realized that it has been way to long since I have made any ATC’s to trade. So tonight I was playing around ..inspired by another friends art and did these two little ATC’s. If you have an ATC you would like to trade for them…or any of the others on my “trading page" , just drop me an email :)
 Eat Crow
Braunlick Bear
Subscribe to:
Posts (Atom)
