Saturday, December 20, 2008

Gingerbread Christmas

I just want to apologize for not keeping up with my blog to well lately. I have made sure to post the blog candy because so many of you look forward to it and I just can’t disappoint you :) but I have been disappointing myself by not getting my artwork posted.

However it has been the holidays and I have been so into doing things with and for my family. This is my little prince Quinton eating the gingerbread cookies I made for him. I also did a gingerbread house but he has to wait for Christmas eve to eat that with the other kids in the family… and I filled the inside of the little house with party favor toys so when they break it open there will be a fun surprise :)


Tuesday, December 2, 2008

Bottled Fairy

 
This is really a lousy picture but she is soooo small. This little bottle fairy's bottle is only 1 ½ an inch high and I could not get the picture to come out clear. She is done with my front back images so she looks cute no matter how she twirls around on her neck cord. Her wings are of acetate and stand off of her body to give her a more dimensional look


Thursday, November 13, 2008

Three little kittens ,,,^..^,,,~~,,,^..^,,,~~,,,^..^,,,~~

 
... are hoping for mittens :)) and since they are faithful friends they should get them too! I could not wait to play with the new Christmas hats and cats and dogs collage sheets but it was really hard to photo because I used a gold paint pen on the hats and it has sparklies all over it.

Saturday, November 8, 2008

Fairy Magic Kit

We were all given these little tins at the last meeting at our local stamp club. We were told to decorate them any way we liked and we would trade them the next meeting. I decided to do a fairy but I could not send her off to a new home with out all of her necessities :)

Wednesday, November 5, 2008

Getting Rusty :D

 Inspired by my newest design team member Jen Crossley, I did this little fabric wall hanging I wanted to share :)

Saturday, November 1, 2008

Tinsel Ornaments *<} :o } >>>

Have yourself a vintage little Christmas
.·::·.·:*:·.·::·..·::·.·:*:·.·::·..·::·.·:*:·.·::·..·::·.·:*:·.·::·.
 
 These really are easier than they look, they are just dressed up ornaments from the dollar store. The instructions for the styles I have done are below but you really could just let your imagination run wild. Each ornament has the same image on the backside but I used my mirrored images available at my little etsy store.. it so that it would look the same no matter what side you were looking at. I will also be recommending some products that I have used but I am in no way connected with these companies, I just like there products.


First decide what images you are going to use and cut them out. I love to do intricate cutting by if your not great with cutting things out you can just leave a quarter inch margin around the edge. If you do this however it will look better if you take a gold paint pen and run it around the edges.


The simplest ones were the last three you see on the bottom. To make these just crisscross a couple of shiny pipe cleaners and give them a couple of twists in the center as you see in picture 1. Then weave some tinsel back and forth around them as you see in picture 2. Curl the ends of the pipe cleaners and glue your images on. One on the front and the other on the back. If you want something a little more durable you can buy the flat wire ornaments. I found the star I used on the last one also at the dollar store.

For the birdcage I used five silver pipe cleaners and then twisted them together with a gold one. Then I wrapped one end of the gold pipe cleaner to form a ring as you see in the picture 3 and left the other half long. Once that was done I attached the other half of the gold pipe cleaner to the hanger on a Christmas bulb leaving only about two thirds the length of the silver ones. This will keep the “cage wires” from pulling straight when hung. Then glue another pipe cleaner around the circumference of the bulb and attach the silver pipe cleaners to that and curl the ends up. Wrap some tinsel around the center gold pipe cleaner and embellish to your hearts content.


I have recently discovered a glue called Zip Dry paper glue and I use it for just about everything. It sets quickly so your not holding things forever while they dry. It is the type of glue you find on the backside of a sticker so if you glue something where you don’t want it you can use another product called Un-Du scrappers solution to remove it and place it in the right spot without ruining the image or item you removed. As you can imagine, doing this kind of project your going to get glue all over your hands and enviably on the project where you don’t want it. However you can use the Un-Du to clean up your project too.                          


For the hot air balloon I used string tinsel. It may look like pipe cleaners but it is not. Cut a length of it long enough to go around the top section of the bulb and attach four lengths to it evenly spaced as you see in picture 6.Glue that around the top section of the bulb as in picture 7. Wrap a wooden block in foil paper and attach the tinsel strands to the sides of the block and embellish as you like. 

The others are just old fashion glass ornaments and a tree topper that I glued embellishments onto. I used Tinsel garlands, foil pipe cleaners, bead trim, fabric trims and I love Dresden foil. It is hard to find so if you don’t happen to have any Dresden foils try going to your party store and picking up some gold foil doilies from the wedding section. The edges of these can be cut off to form paper lace and sometimes you can find lacy medallions in the center that can be cut away and used too.


Monday, October 27, 2008

Star Gazing Shadow Box

This little shadow box is about 2 1/2 inches deep and it is a 5 x 7 opening but you really can't see the depth in the picture. The little stars you see are really on the back wall of the box and the fairy stands out from that. She is two dimensional as her translucent wings stand off her body.

Saturday, October 18, 2008

Thank you for Created By Hand

 Love this challenge and I need to find the time more often to play :)) Don’t miss all the other entries this week as everyone always needs Thank you card ideas! Created Byhand

Mixed Media Monday Purple & Blue

I did a really simple card for this weeks theme at Mixed Media Monday, but it was fun to get a little ink under my fingernails …lol

Monday, October 6, 2008

Going Batty

My back is better but I am still having trouble stamping. You would not believe the muscles you use in your back to stamp …lol. It has been driving me batty but I can still play with my soldering iron so I did this little pendant. Just one pendant but a different picture one each side :)

Quinton's First Birthday Cake ... Jungle

Wow … this year has just flown by! My little grandbaby turned one yesterday! This is a picture of the cake I made for his big day! I had stayed up until 2:00 AM making the little animals but when I walked into the house with that cake Quinton's eyes just lit up! ... so it was worth all the work. His room is done in jungle and his monkey is his favorite toy. Once we got to the cake and he realized that you could eat those toys it was hilarious! We let him pick the animal he wanted and then we sat him in his high chair with the little top section. His Mommy and Daddy try not to give him sugar too much so it was hard for him to believe he could eat all he wanted. He ate half of that elephant and about a third of that top little cake. I don't know where he put it because we had just eaten about a half an hour earlier. I only have the pictures I took of the cake before we went over there because I forgot my camera. There were lots of cameras there though and his mommy said she will send me copies of all of them … I will post one as soon as I get one too! :)

Sunday, September 28, 2008

Web Woman Coffin 4 Created By Hand Challenge

This is for the Created By Hand Challenge this week. This little charm/pendant measures 1 1/8 th of an inch long and is two images sandwiched between glass.... just one charm but the picture shows both sides of it.

Tuesday, September 9, 2008

Halloween Shoe 4 Theme Thursday Paper Shoe Template Pattern


I recently found a new challenge site I love. It is called Theme Thursday. I have been watching it for a while but when they posted the theme this week was Halloween I had to play. I went all out and designed a pattern for this little stamped witches shoe. You can really have fun with it as it could be used for a party favor for many occasions. Some ideas are pink with boa feathers for a little girls birthday or how about white glitter paper for a wedding? The pattern for this is available in my little etsy store Altered Artifacts.

Tuesday, September 2, 2008

Wishing Box


A little wishing box to fill wishes to be remove as they come true :)

Thursday, August 21, 2008

Mixed Media Monday ... Numbers ATC's


There are several challenges that I really enjoy looking at what everyone else has done and I get a chance to play once in a while too. This week at Mixed Media Monday the theme was Numbers, so here is my entry. I have also placed these on my ATC’s for trade page but I want to trade them as a set. So if you too have a little triptych set email me and we can set up a trade :)


Friday, August 15, 2008

Witches Graveyard

This is not the greatest picture because I don’t know how to use my cousins camera very well but my camera is on its way home from California! Please notice the scary eyes in the keyhole of the rusty backdrop. This backdrop and the rusty things piled up on the corner is from a doorknob mechanism that I took apart. The spider web and spider (plastic) were rusted with the new rusting technique that my son came up with for me. This is one technique that I will cover in the Halloween workshop. It is such a cool technique and only takes a few minutes so it is instant gratification. The little ghost witch is printed on transparency and then I cut the point for her hat from the background I cut away. I draped the cheesecloth across the back for the picture so that the little witch would her transparency but it did not work so great. I will try for a better picture when my camera comes home.

Tuesday, August 12, 2008

Spook Show Workshop


 Click on the thumb above to go to the larger picture

Thanks to my cousins camera I was able to get a picture of what I have been working on the past few days. This is three projects for a mini workshop that I will be overseeing at The Latest Trends yahoo group. I just put up a new collage sheet for both of the assemblages … Spook Show and Pranksters too. I will be offering it 50% off plus postage to all workshop members who will be making an assemblage for the workshop. I will be covering laminating collage images to chipboard... how to match the images up for a front back image so that you can make ornaments like the Pumpkin Sitter that you can see hanging in the center of the picture on the left side. This technique is also used on the Prankster’s assemblage. This was done for the center of the table so it can be seen from all sides. I turned it around in the picture to the right so you could see the backside. I will also cover how to clean up the edges so that it looks professional and you wont have those pointy cut bumps. Then my spray glue glitter technique is very useful for holiday projects too. I have some great tips to make all of this really easy and you can do something as simple as the hanging ornament or a little more intense and do an assemblage. It doesn’t start until next month so you have plenty of time to come on over and join the fun!

Friday, August 1, 2008

Gothic Arches ...For The Birds

 
The theme over at Gothic Arches this week is “For The Birds” so here is my little twist :)

Monday, July 28, 2008

Asian Collage Shrine


These are some of the collage swap cards I did for one of the groups I am in. In the center you can see it closed. I used cardstock that was red on one side and black on the other. Then I embossed Asian text in red and closed it with a spiral paper clip. Then I collaged the inside. Some were done in reveres with the red on the outside and the black on the inside. It was a fun swap and I am excited to see what I get back :)

Monday, July 14, 2008

Got Mouse?

This is my entry for the Gothic Arch challenge this week. The theme is Cats ,,,^..^,,,~~

Mixed Media Monday ... Let’s Have Tea

This weeks theme at Mixed Media Monday is one of my favorites so I had to play :)

Friday, July 11, 2008

Wish Upon A Star PoP uP ATC


My little fairy princess is wishing upon her star :) It is an ATC size when folded flat and a denominational shrine when opened. The pattern will be available in my little etsy store  

Tuesday, July 8, 2008

Gothic Arches ... Patriotism


When I saw the challenge over at Gothic Arches this week was Patriotism I had to participate. My arch features my hubby because he is the most patriotic person I know. Although he was officially only on active duty 2 years he has 28 years in with the national guard. They are what is called weekend warriors and are suppose to be on duty one weekend a month and two weeks a year however my hubby was on duty much more than that. He was often called to do an extra two – six weeks several times a year and he would always go. Over the years he spent many weeks teaching the younger guys, fighting fires, shooting competition for his unit and he even went to the LA riots. Although he did not get to go to Irac his heart was there with his unit. About a month before they were to leave he blew his knee out while on duty and it required surgery. He was devastated when they would not let him go… so when I think of patriotism I think of my hubby :)

Monday, July 7, 2008

Tickets to the show! *<(:oD


 This little fabric hanger now hangs in my friend Lynn Stevens studio :)

Wednesday, July 2, 2008

Just arrived :)


Yesterday my daughter in law’s best friend had her first baby. It is a boy 7lb 3 oz and his name is Elijah. It looks like a best friend for Quinton! Anyway I was asked if I could make them a card and I thought I would share it :)

Friday, June 27, 2008

She is such a tart!

  
I spent most of the day cutting rubber and making inventory bags but I had to take a break and play a little bit.

Friday, June 20, 2008

The Big Pool

Well we had to graduate to the big pool. Suddenly in the middle of the night we had escaping puppies :))

Thursday, June 19, 2008

Four More :D

Wow! that went well. I was so shocked to see how fast my ATC's went. It was so fun I made four more today ...lol.

Wednesday, June 18, 2008

Interested in a trade? :)

After completing the ATC workshop I have my courage up enough do a few trades. If your interested in a trade just email me :)

Sunday, June 15, 2008

Row House Broch

 Just a little soldered row house broch I did

Monday, June 9, 2008

By The Sea 4 Mixed Media Monday

 
I have been seeing lots of post for challenges that look like they would be so fun and now that the ATC workshop I was in has ended I thought maybe I would have time to do one or two now and then. There are several I have looked at that I would like to try but I just don’t seem to have the time and energy to do challenges every week. So I thought I would just do what I can when I can :) This is the first one I thought I would try. It is for Mixed Media Monday and the theme was “By The Sea”. For my card I started with dry brushing white cardstock with blue. Then I stamped my little verse and embossed some swirlies on. I layered that onto teal cardstock that had been edged with versa mark ink and embossed pearl and glitter. Then I added some mulberry paper, a grunge board swirly and pop dotted my vintage postcard image on top. I then added a little stickles to that to give it a touch more sparkle.

Friday, June 6, 2008

Oh No!

I have wanted to post this canvas but made it for a one for one swap that I did with my friend Mary Schweitzer (greenwomandesign) but I did not want to show it off and ruin the surprise for her. Well I finally got it in the mail and she just emailed me that she received it! It is 6" x 12". I did the texture with spackle that I had mixed with laytex paint then when it had set up a little I stamped into it. I also used rub on metallic on it but they did not show up too good in the picture : / I call it "Oh No"

Go check Mary’s blog to and see the lovely Fairy Shrine I received. The pictures are good but in no way show how beautiful it really is.

Thursday, June 5, 2008

Puppy Love

 The grandpuppies are growing strong! They have there eyes open and are standing on there little legs now. Hubby has talked me into keeping the only one we know is for sure a snorkie (that was real hard). She is the one with the yorkie markings on the left. Hubby says that because our yorkie is so old and won’t live much longer that we should keep her. That way we will still have a little part of him when he goes. We have decided to call her Tabby after her daddy Toby…. cute huh :)

Monday, June 2, 2008

Wonderland

 
This has been a pretty exhausting week, after feeding tiny puppy every 6 hours he passed away on hubby's birthday. I just got so attached to him but he just could not gain any weight and became more and more listless. Because of this and all the preparations for hubby’s birthday I did not get any art done so I am posting something I did a few weeks back. I love the Alice in wonderland stamps and this is a card I did with them that I though you might enjoy :)

Sunday, June 1, 2008

Today Is Hubby's Birthday!


Because we have had a house full of company all day, I will be posting the winner of this weeks candy and the new candy for next week tomorrow :)

Inka

Monday, May 26, 2008

GrandPuppy Update :)

This is the latest photo of the grand puppies :) Most are growing like a weeds but there is one that is still pretty small and has really not grown at all :( We are worried about him and I have been hand feeding him every 4 hours this past week. The vet says that some puppies don’t learn to suckle right away and this makes them smaller. Then by time they figure it out the others are so much bigger and push them out of the way. Now we are not sure that is it because this puppy might just be naturally smaller. We have two reasons for this line of thought. The first is my black male schnauzer was from a litter of puppies that were being breed down to the new toy schnauzers. He was third generation and they don’t guarantee they will be small until the fifth generation. He is an average size mini schnauzer but he does have the genes for a toy schnauzer. The second reason is a little more apparent. We also have a male Yorkie : / yep he could be the daddy of some. We thought that he would be to small to reach our girl to mate but look at the puppy in the top left hand corner????? … looks like Yorkie colors to me …. so we might just have some Snorkie’s! Now if little tiny puppy (the one laying on top of the white one) is from our Yorkie and takes after his daddy ????? maybe he is suppose to be small. So we are just hoping for the best and will have to wait until they are a little bigger before we can truly say if they are Schnauzers or Snorkies :)

Sunday, May 25, 2008

The last of the ATC workshop :)

I have finally completed the ATC workshop based on Bernie Berlin's book with the last two lessons 16 and 17. The first is a square tin for storing your ATC’s. I think I am going to start making one in the swap theme for each swap I am in. It is done by sanding the tin and then dry brushing on some gesso. Then you drop alcohol inks onto the tin, sprits with a little blending solution and dry it with a heat gun. Then scuff with sandpaper and stamp. The second one is a recycled tin can. This is also for storage. I might flunk this one because you are supposed to make the ATC label by embossing metal tape. I did that and I just did not like the way it looked so I peeled it off and used a metal tag to make my label. I plan to add a chain with a P38 can opener on it … the type that use to come on sea rations and can be carried on your key chain but for now, I did not want to get to far off the lesson …lol

Monday, May 19, 2008

GrandPuppies! ^.^

I got grandpuppies! The momma is a white schnauzer and the daddy is a black schnauzer. As for the puppies we now have two girls, both black and three boys, two black and one white :) There parents are just as cute as the puppies too! The past week when I fed them Baxter (the daddy) would not eat until after Sugar (the momma) ate her food and then came over and ate some of his too. I got on to her the night before they were born and told her that plate was for Baxter and while I was telling her that, Baxter pushed his plate to her, so I let her have it. When she had all she wanted he ate the rest. I think he knew she was close to delivery and wanted her to have all she wanted to eat ...lol. We put her in the laundry room to have the puppies and then after they were born he came to the gate we had place at the door. Hubby let him in and when Sugar saw him she pushed each puppy one at a time out for Baxter to see :) ...it was just precious! In the picture three of them where they should be and the other two under her bum :D

Monday, May 12, 2008

ATC workshop ... Lesson 15

For my last ultra card I chose Journaling. This was pretty simple. I just dry brushed the card with blue acrylic paint, stamped it with gold sequence waste and edged it with gold. Glued on my collage image and used a black permanent marker to do the journaling.

ATC workshop ... Lesson 14

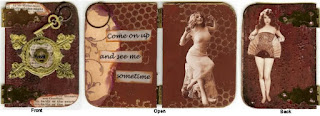
  For my second ultra card I chose to do a Diptych, I cut two pieces of thin matt board and rounded the corners on one side. Then I used the fresco technique to give it an old world look. The print came from an old dictionary and I used the references to “lady of the night” “lady of the evening” and “lady in waiting”. Added some brass hinges, a keyhole and a Dresden foil frame. The little brass key is just hanging from a spiral paperclip. Inside I stamped some sequence waste and then added some specialty paper and cutouts from a collage sheet. I printed the saying on Velum and just glued that in place. On the back I just glued on another image that had been cut from a collage sheet.

Sunday, May 4, 2008

Dream Big!

 
Just a little soldered charm to remind myself to "Dream Big"

ATC workshop ... Lesson 13 ...My ATC Shrine


The next three lessons are Ultra Cards. You can choose from Journaled, Folded, Diptych & Triptych's, Pen & Ink, Digital or special for children, I choose folded for this lesson. I am so pleased with how mine came out. Well you all know me and fold-out, pop-out or dimensional paper :)) I had to make it my own …lol. I just was not satisfied with doors that opened to reveal the image so I created this little ATC shrine. I have drawn my own pattern. I will be offering it at my little etsy store

Sunday, April 27, 2008

Here I go again :)


I have a bunch of antique cook books that I have spent many hours reading. Not only can the recipes be hilarious but also the ad’s they have. I have been wanting to start a new altered book and I decided to use one of my cookbooks for it… (I picked a pretty plain one that had a burnt spot on the cover) … anyway I thought I would scan some of my favorite ads and recipes to use in my “Altered” cook book so I could have the best of all of them in my altered cookbook. I am going to call it “A taste of life” so it is not going to be just recipes :)) This is from one of my favorite cook books called Cupids Book. It was given to the bride when the happy couple purchased a marriage license. It has some hysterical ads that are directed to the little woman by the local merchants :)) This is one of my favorites and I just had to share it!

Sunday, April 20, 2008

ATC workshop ... Lesson 10, 11 & 12

Your not going to believe this one but I think I am caught up with the rest of the class! Lesson 10, 11 & 12 only had one card each :) Lesson 10 was metal tape. You just drizzle some alcohol ink onto metal tape, sprits it with the blender fluid and let that dry. Then you tear it into pieces and stick it all over the card. Once that part is finished just emboss some of the tape and layer it on. I call mine porn star … lol. Lesson 11 was a Mica card. Once you have a couple of layers cut to the size of an ATC it is done the same way with alcohol inks. When they are dry you layer a transparency between the layers of colored mica and connect the layers with eyelets. Lesson 12 was friendly plastic. I cut mine into strips and wove them together and then melted them onto the cardstock. Then I added a circle of red in the top corner and stamped a moon face into it while it was still hot. Then I pressed in the brass dragon fly and a vintage die cut on the bottom.

Saturday, April 19, 2008

Notable

I mentioned in my last post that I had been inspired by Mary Schweitzer (Green Woman Creating) piece “Noteworthy”. I had contacted her to make sure she did not mind if I made a doppelganger of her piece and she was very encouraging. I love artists that have a desire to inspirer art. There are so many artists that are so worried that someone might use their idea that they can’t see past their own nose. I have always felt that to emulate someone’s work is a complement to them and it is refreshing to meet other artists that feel the same way :)

So meet “Notable” my version of “Noteworthy” I soldered an antique canning jar lifter to a candleholder to form most of the body, then added a vintage look hanger to that. The candle holder part now holds paperclips. I then attached the head by positioning it over the top of the jar lifter and pressing air dry clay around the top loop of the jar lifter and into the bottom of the head. This created a little bottom in the head too… forming a little cup for the pencil hair. An antique dance card pencil hangs from the clipboard that was made from a piece a rusted metal. The back of the calendar was also made from rusted metal then hung on jump rings on the canning jar body. I printed the calendar on my computer then I carefully spread some foil leafing adhesive on the top edges to create that gummy edge you see on tablets. When that was dry I used a little talc on it so the top edge was no longer sticky. Now the pages will pull off like a tablet as the months change.