Friday, January 3, 2014

Basic Theater and Puppet Instructions:


Printing:
My images should show pretty large on the internet unless your browser resizes them to fit the window. If you received your image by email, some email programs will resize them for viewing as well. So in your email program, if you right click the picture and save it will be smaller and it will not print as clearly. To make sure you are getting the original image right click on each paper clip. A list should appear, choose “save as” and save the image to your hard drive. My pictures is usually a good place to save them. The smaller bonus images will need to be copied and pasted onto a sheet the size of an actual collage sheet for these instructions to work. If you start a blank page you can copy and paste it onto the sheet and fill up the sheet as your collection grows.
Use your photo program to open them since they are in a .jpg picture format. Once you have them on the screen in your photo program, hold down the “Ctrl” key and at the same time press the “P” key. This will open your printer settings. Make sure that you choose ... under quality choose “best” and make sure that the “fit to page” box is checked. Then choose the paper type you are using
I print my images on brochure paper or you can use a light weight photo paper also. I always use a laser printer because it has a finish that is like what you would find on a commercial game board and it is resistant to splashes and spills. An added bonus is that the ink will not run when it gets wet so if you use a water base glue, your safe :))


Laminating the imagines to matt board:
For all my facades and puppets I like to laminate them to a light weight matt board. If you do it right, it will be hard to tell it from a die cut image.
You can purchase medium or light weight matt board at your local office supply store or just use the light weight gift boxes you get at the dollar store. Even a cereal box will work.
I used spray glue on the back of the image and on the matt board, sandwiching them together. Make sure to smooth them from the center of the sheet to the edges so you don't have any bubbles or wrinkles. Then cut them out and sand the edges with a emery board. Be sure to use the heavy ones for artificial nails.
Once the edges are sanded smooth, use a marker on the edges of all you pieces. I use a skin tone for the puppets but sometimes for the clothing section of the puppets and for the theaters I would use a color matching it to the main color of the image. They also look great with the edges done with a gold paint pen. Be sure to angle the marker or pen from the back side so you do not accidentally mark the front of the image and only color the cut edges. That way no one will see cut cardboard edges and it gives it a commercial looking finish. On the theater facade, I covered the backside with scrap booking paper also. That way the theater would still look nice from the backside as well.

For most of my theaters I print two copies of the facade and select elements from the second copy. Then I laminate the elements to matt board as described above and glue on to the top of the  full facade giving it a layered pop out. I would choose things like the, pillars, the bottom of the stage, the fascia and so on. This will gave the theater a little dimension but of course they still look great with out this extra layer. Then just embellish as desired. You can add glitter, little scrapbook flowers, brass charms, feathers or what ever fits your piece. The main thing is to have fun and make it your own :)  

For larger puppets and if I am making a diorama display, I use brads on the puppets and make little wire stands. To make the stands I start with about 12 inches of wire and I twist the top like a paper clip then the bottom into a stand like the picture. Then I a flattened paper ring on the back of the puppet for the stand to hold to. This also works for the wire wands. This makes it easy to convert them from display puppets to performers in "the show". For smaller puppets and jumping jacks it is better to use embroidery floss and tie knots threw punched holes. Then you can just jiggle them around for your show. The most important thing is to have fun... making it and preforming the shows as well!


These are a little worse for wear as my grandchildren have used them for play for several years.


Long Time No See!

December is one of my favorite times of the year for posting some great free downloads and fun little projects. I had several planned too. However my son and his wife were planning to move into the house they had just bought so I was watching my grandsons. My  daughter in law was still in school and trying to pack as my son was busy trying to get there house ready to move into. It was only suppose to be for the first two weeks, then Denny was going to take the kids and we were going to take a break so we could do Christmas. So on Friday the 13th.... yes, I said Friday the 13th... we dropped the kids off with Aunt Judy and my son and I went Christmas shopping. It was such a wonderful day!... until... we got home. As my son was leaving our house he fell and broke his leg : / It was a very bad break too, his foot was totally rotated backwards. Jacque was doing her finals and Denny could not get up the steps to his house so until they did the surgery the next week I had my son to take care of and the grand kids. With my health it was taxing just to take the grand babies for the first two weeks so when they all went home, I was beyond exhausted. Needless to say, I got nothing else done. But I do plan to make it up with some really fun downloads this month :)


I have had several blog friends that were having trouble finding my basic theater and puppet instructions. I do have them kinda scattered here and there so I am going to post those for now... but hold on to your hats... good things are coming in the new year!

I do hope you all had a wonderful holiday and I also wanted to publicly thank everyone who sent me a cup of coffee this past month. It was so sweet of you to think of me this holiday season :)

Tuesday, November 19, 2013

Thanksgiving Joy Free Printable

I just thought I would share a little card that I feel really represents what thanksgiving is all about :)


Feel free to pin the thumb above but please do not pin the actual download. I would like everyone to stop by here to download it so they don't miss all my other fun free downloads.


Enjoy!... and Happy Thanksgiving! 
Inka

Saturday, November 16, 2013

Punch & Judy Free Printable

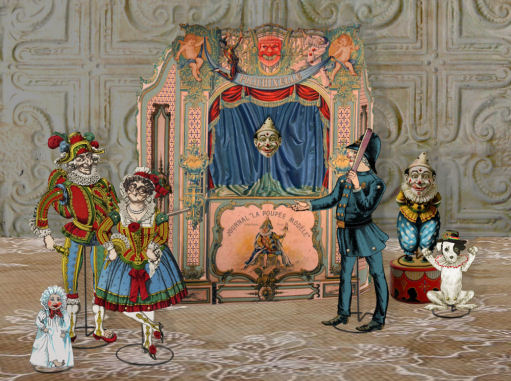
I do have a free printable for you but first let me show you what I have been working on. As much as I wanted to get my nutcracker theater done this year, I needed to make sure this was done for Christmas. The two main puppets were from an early 1800's magazine and were so poorly printed it literately took me weeks to complete them.


Someone very special to me, who happens to be a big Punch & Judy fan, is going to get a kit for this for Christmas. I have had the theater printed larger than my printer will print but I am going to print the puppets large myself. Then I will put it in a special box I am working on with the chip board, brads, glue and so on so that she can make it herself. The graphic's for this are now available in my little etsy store.

As you know... I usually try to make my free image go along with whatever I am working on so I have a cute little Punch and Judy free printable for you. I thought it would make a great invitation to your show or Punch & Judy birthday party, or as I have used it to create a box lid for the little theater to go into.


If you check it out in its larger version, I think you will be able to tell how clear I can make these vintage images :)

Feel free to pin the thumb above but please do not pin the actual download. I would like everyone to stop by here to download it so they don't miss all my other fun free downloads.


I also would like to post a little history on Punch and Judy:
 
May 9, 1662 is the day that is credited as Punch's birthday as that was the first recorded day his show was preformed in Britain. The British show developed into "Punch and Judy" with its first published script in 1827.  However the show was preformed in the 1700 in Italy only the puppets had a different names, Pulcinella and his wife Joan. 
 He speaks in a distinctive squawking voice, assisted by a "Bottler", who encouraged to participate and collecting money. The Bottler also played accompanying music or sound effects usually on a drum. Today it is preformed often in private parties and is fun for all ages.


Sunday, October 20, 2013

Quinton And Jaspers Birthday Cakes

Wow... Halloween is sneaking up on me fast! I just have so much going on this time of year. Both my grandchildren and there mom and dad has had birthdays in the last two months. I always try to do a special birthday cake for them :)
This year Jasper wanted "George"... his favorite cartoon is Curious George. Here he is giving "George" a kiss.


And here is a closer look at his George on a mountain of bananas cake.


It took grandpa four hours to make all those bananas!

Then Quinton wanted a dinosaur cake again. He told me that his dinosaur cake last year was nice but this year he wanted the bones...lol. He has been telling us he wants to be a paleontologist when he grows up since he was three.

So here is our little paleontologist :)


And a closer look at his dinosaur dig cake.


Saturday, July 20, 2013

Typewriter Keys Watch Band

Once again it has been a long time since I posted. I guess I just have to face the fact that I am going to have to take life a bit slower. Anyway... hubby has been busy taking apart an old typewriter for me to make some jewelry with. I made this cut little watch band with them!


Monday, June 17, 2013

WIN BIG! with the Dare to Be Different Imagination Challenge!

Asha from the Whimsical Peacock and Angela from My Personal Accent are  are hosting an art challenge Called “Dare to Be Different Imagination Challenges”

There first challenge calls for using any two of my free images! I am so honored to be a part of this. They have some really awesome prizes too! So stop by there blog and read the very simple rules and most of all 

GO MAKE SOMETHING FABULOUS!

This is some example projects made by Asha


Here is a list of there prizes just to tantalize you just a bit :)) 
 Grand Prize:
* $30 Amazon.com Gift Certificate
*whimsically ☞ ACCENTED “SCRAP✁PACK”

SUPER SIZED (WE WERE SO DARN EXCITED ABOUT THIS WE WENT A BIT OVERBOARD!) ($40.00 value)
*“MINI”-handmade art journal workshop pack ($40.00 value)
*Digital Image Set by Inka at ALTERED ARTIFACTS http://alteredartifacts.blogspot.com
*vaness designs: free ad space on their website and design a button for your blog or website with logo $45.00 value!!!!

Second Prize:
$20 Amazon.com Gift CertifiCATe

HANDCRAFTED BANGLE BRACELET by tHE wHImSiCal PEaCOck®signed)$25.00\VALUE
Digital Image Sheet by Inka at Altered Artifacts

Third Prize:            
$10 Amazon.com Gift Certificate
(GIFT-TAG SET OF 4 )$18.00 VALUE(HAND-PAINTED) tHE wHImSiCal PEaCOck®
Digital Image Sheet by Inka at Altered Artifacts


Tuesday, June 4, 2013

Studio Progress

I have been so busy! Yes... working on the studio and getting my planting done.I have also been busy working on my studio.. I finished the "crate stack" for my printer. I added some vintage casters and a little lace curtain to hide my inkjet printer. 


and I have put some of the vintage locker baskets to use... I have been arranging and rearranged things a hundred times...lol. I even put the newspaper shelf paper on my bookcase. So here is another peek at that. 

I got much of my lace wound onto the printable spools that I posted previously. 


I just love to edge them with a gold paint pen... They look so authentic
Its all coming together now... I am so excited! 


Wednesday, April 10, 2013

Happiness in the kitchen once again!
Free Printable Little Cooks... Chefs

I know you all think my hubby is the greatest but he does have a few quarks that really bug. One of those is that he insists on having a bunch of junk sitting on the counter all the time! So I put it all on a wooden tray so that when company came I could quickly hide it away in the pantry. But I STILL HAD TO LOOK AT IT!  Recently I saw a post on pintrest where a lady had put all her tea necessities on a silver tray and knew that was my answer. I found one I loved at a local thrift store and on went all his junk.


I put his splenda in a little silver sugar (of course) his creamer in a little silver overlay creamer jar. Not that he drinks coffee... he has to add it to his hot chocolate to make it creamer...lol. I found a silver swan napkin holder. Our butter has always been in a vintage refrigerator dish. I used the sugar shaker for his garlic salt and his vitamins and hot chocolate packets went in the silver biscuit canister. Now there is happiness in our kitchen once more!


Feel free to pin the thumb above but please do not pin the actual download. I would like everyone to stop by here to download it so they don't miss all my other fun free downloads


Saturday, March 23, 2013

A Working Studio ... Free Scissor Printable

I am loving being able to work in my studio again. I made this cute little necklace with the tiniest little antique change purse.


 Not only am I able to create again but with all my supplies and tools in place I can now start getting things organized and decorated! I have just added a new "old" shelf that hubby made me from an old door and antique door knobs.
and I have to show off my latest find... a scissor light for my workbench. I was so excited to find this. I pictured it with an antique light bulb but I have ordered some reproduction Edison light bulbs to actually use.


I got some crates from the craft store. I distressed them and used vinegar and steel wool to age them. I think they are perfect for Fairyland and some of my little theaters. My other distraction you can see sitting on the crate below.... Yep... I got a Pazzles cutter! You can copy and paste any .jpg into it so if you have software to open the cut files you can convert them to .jpg and just copy them into this cutter. I have just been going crazy finding all the fun cut files available! I will be making some stencils for the sides of the crates too. Just as soon as I figure out the software for it.. lol.


Speaking of decorating and scissors... I thought this little graphic might look good blown up and framed. I think it would make a cute little card too. I hope you can come up with a fun use for it :) Oh and I almost forgot to say... check out the brand on those scissors she is holding :))


Feel free to pin the thumb above but please do not pin the actual download. I would like everyone to stop by here to download it so they don't miss all my other fun free downloads


Wednesday, February 20, 2013

Vintage French Chocolate Change Pocket Envelope Free Printable

I love this little change pocket. When a servant was sent to purchase something, the change was often put in a change pocket with the item to be given to the employer. I love this little French chocolate change pocket and I wanted to have it posted for Valentines day. It could be used to hold a little card or tea bag for a birthday gift too.


Thursday, January 17, 2013

Studio Update

I am not quite ready to show the entire studio redo but I thought I would share a few pictures.

As much as I love my new-old sewing trunk, the sewing space is a little cramped. For everyday sewing and mending it is fine but for those time I need a larger surface it sucked. So we picked up this old sewing machine cabinet on Craigeslist and removed the sewing machine and turned it into a sewing table. Here is a picture of the before.


and then the after...


The top folds over for even more work surface and since this picture was taken I bought one of those little pads so your cell phone wont slip off the dash of your car and placed it on the treadle for my foot peddle...worked great :) 


Then my printer was a big problem. It is a professional version color laser so it was large and just doesn't fit the theme of the room. So we bought an old Victrola cabinet for it. I forgot to take a before picture but here is the after picture. 


 And then... check out what I scored on Craigeslist this week! Yep... a whole bunch of vintage locker baskets! I am an organizational freak and now I am going to have things more organized than I have ever had them before :))


Saturday, December 29, 2012

Little Glitter Houses and Church
Printable Christmas Ornaments


Yes Santa.... Inka is still alive :)) I am so sorry it has been so long and I had some great free Christmas graphics planned. Not to mention I wanted to get my Nutcracker Theater in my little etsy store. I made the characters from redressed Tuck and Sons paper dolls and the Theater is just an amazing Christmas fantasy! However I still have some work to do on the nutcracker character but he is coming along nicely.

It seems that the past few years life has just gotten in the way of my blog this time of year. This year my daughter in law was ill. It took the doctors several weeks to figure out that her gallbladder had problems, then the surgery, then the recovery. So during all this time I had my grand babies. Taking on a 14 month old when you have MS is an ENORMOUS undertaking! Sitting at the computer while watching him was mission impossible! Although his brother who is 5 helped a lot, by time I got him in bed at night I would just collapse. Then to top that off hubby has kidney stones and was on the couch for several weeks too.... no help there...lol.

Once the boys went home, I had Christmas staring me in the face. I usually have the decorations up and the gifts bought by the day after Thanksgiving. This year we skipped Thanksgiving and I was still doing some shopping the day before my big Christmas eve party. So I thought I would share some pictures of our holiday decor and the little graphic for my ornaments.


 Our tree was dressed in crystal icicles, little news print houses and little music print churches. The graphic for these print with the news print and music print already on them. Now available in my little etsy store. I also I glued a heavy wood bead inside the house to weight the other side. That way the little tree did not make the ornament hang crooked. However you would not have to put a little tree on yours I just felt it really dressed them up. You might have other ideas that will work just as well.


I wrapped the gifts in newspaper and burlap ribbons


The stockings were hung by the chim... well the coat rack with care :)) I made them from vintage lace table cloth and they are reversible. You can cuff them if you like but I ended up with too much to put in them so by Christmas they were hung without the cuff.

 
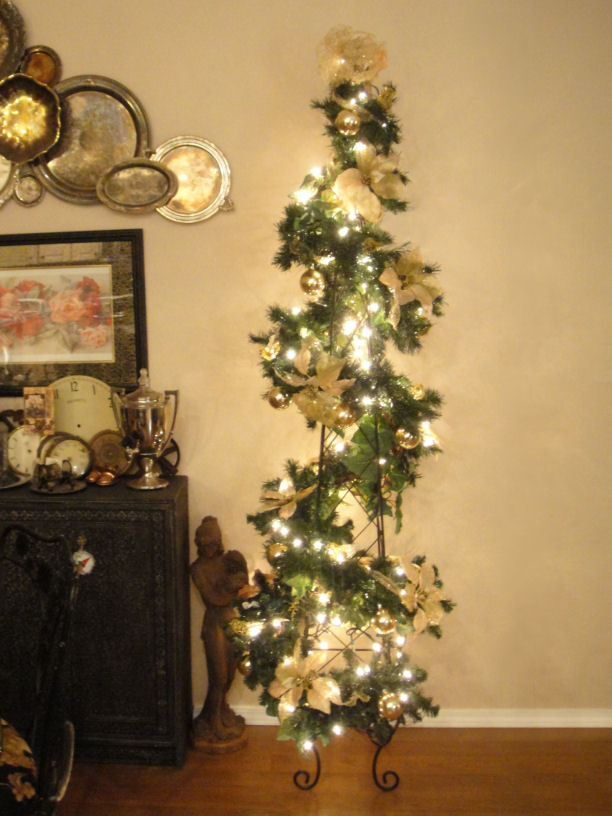
The topiary was dressed in gold this year.


And my daughter in law did a lovely job decorating the chandelier.

We hung glitter snowflakes from the ceiling as we always do. This picture really doesn't do them justice. They spin and twinkle with every movement and it just sets such a holiday mood.


I even changed the display in my glass cloche for the season.

Well there you have it :))


Monday, September 10, 2012

I have some bragging to do

One of my customers has made some awesome art with some of the images purchased from me and I just had to share. I especially like what she did with "Dark Marie". Most of these have sold already but if you don't find something you were looking for, I am sure  she would do a special request. Please visit her shop at
NacreousAlchemy on Etsy


You can click on the thumb above to check them out a little better or you can just go to her shop and see the various views of them. You might just have to check her sold items though

 :)) 


Monday, July 2, 2012

Lace, Ribbon, Yarn, Trimmings Spool Organizer

I am working on getting all my lace and ribbon organized and designed this little spool from some vintage sewing graphics I had. The graphics are available in my little etsy store


To make it strong enough I print it on brochure paper or matte finish photo paper. Then use spray glue to attach it to a medium weight matte board... You can purchase medium weight matt board at your local office supply store. Cut it out and sand the edges with a emery board. This will give it a die cut look. You can also dress up the sides with a paint pen or heel and sole dressing that is normally used for shoes and that seals the matt board and really makes it  look vintage too.

I have several styles available so stop by my little etsy store and check them out!


Wednesday, June 27, 2012

Studio Update Sewing Trunk
Free Sewing Printable

I know this studio redo is taking forever! I have so many projects and I keep doing a little on this one and a little on that one... and nothing is getting done! So I decided to just get one completed : )

This is what I started with.


First I darkened the interior metal with jewelry blackening, then painted the inside with a dark cream paint. My thought was to paint sign graphics from an antique sewing store sign on it but then I found this fabric and I was in love. Hubby built a shelf that sat on the metal brackets you can see in the picture to hold my sewing machine. It has a drop down cover so I can pull the machine out to sew. We added some large casters so that it would be the right height to sit at and also so that it would open and close easily. 


This is with the drop down desk closed 


... and this is with it open

Oh yes... and the free printable... what else could I post :))


Feel free to pin the thumb above but please do not pin the actual download. I would like everyone to stop by here to download it so they don't miss all my other fun free downloads


Enjoy!
Inka 

Bragging Today On Vanessa Witschi

One of my customers sent me some pictures of her project and I just had to brag about it. She used my wings image printed on acetate for her absolutely darling little Fairy Mermaids... and as you know I LOVE fairy's. This one sold in just a few hours but if you wanted one I am sure she would make a special one just for you :)


Check out Vanessa Witschi's website Mermaids Dreaming 


A close up of the wings


Wednesday, June 20, 2012

Sun and Sea Summer Fun Free Printable
Two New Digital Sheets Available Too!

I did two new digital collage sheets for my little Etsy store and I had a couple of images left over. Some will be for the free bonus that I always send along with my sheets however along with a little preview of what is new, I thought I would post a summer fun freebie for my blog post this week :) they are just so cute with there little sail boat!


Feel free to pin the thumb above but please do not pin the actual download. I would like everyone to stop by here to download it so they don't miss all my other fun free downloads
Here is a little preview of the summer fun sheets I did by special request. They are available in my little etsy store now. You can use the key word "sea" in the search link at my shop to find them. If they do not show up they have been sold but will be relisted shortly!


Vintage match box dispenser made into a place to keep and display beach pebbles found on a special trip to the beach.
Enjoy! Inka

Saturday, May 26, 2012

Paper Circus and more!

As much as I have told myself that I had enough vintage papers... I have paper fever! I just can't resist purchasing a find like this! Nine sheets in all but only seven are Circus theme. They are from an early 1900's woman's magazine that offered a center fold of paper toys each month. The Circus sheets are bound for Collage sheets in my little etsy store. However I do plan to offer the others as free downloads on my blog. Two are Christmas theme so they will have to wait but you can expect the others to be showing up soon :)


If you love Circus and would like to make some art examples for my listing page with these just email me using the link on my right hand sidebar. I will be taking the first two or three so you could get them free!

Studio Progress

I wanted to wait and show pictures of the completed studio but things are not going quite as quickly as I had hoped. I keep apologizing for not posting and making up excuses, but the truth is my health has not been great. I had hoped that I could keep up but it really has slowed me down. So I am going to have to just admit that I just can't keep up the pace I have in the past. I love sharing my free printables and I do have so many goodies to share so please forgive me and I will post them as often as I can. Once I get the work on the studio done, I should be able to get some goodies up a little more often.

This is what I started with. I found this awesome bedroom set on craigslist. It had fallen off the truck while being moved so it was in sad shape. The amour's door was missing and someone had put shelf's in it to use it for a bookshelf. There was trim missing on top. a broken drawer in the bottom that did not even match and one foot was badly worm eaten. The trim on the headboard had been busted and some of it was missing. There was a foot board too but it did not get into the picture. The set of drawers were missing some of the nobs and had the top replaced with an odd marble.


But my hubby is handy dandy. He cut the top down on the amour to eliminate the missing trim and also because it was too tall for my studio. The foot board had the same carved feet as the amour so it took one from it and replaced the destroyed foot on the amour. Then he took out the drawer and replaced the shelf's with some oak that he stained the same color. Since I haven't gotten to the decorating stage, it is covered with junk so the finished picture will have to wait.. but it is good!   


Then hubby used the headboard and the piece that went across the bottom of the foot board to make me a desk. We used legs from a table that I had picked up at the thrift shop and some antique picture frame trim that I had found at a yard sale a long while back. He designed a keyboard mechanism so that it disappears up under the desk when not in use.


I have ordered a glass top to fit but for now I am just using a glass cutting board to protect the top until it comes in. As you can see by the pictures, I had a hard time choosing the wall color but after painting three times, I settled on chocolate brown :))


These baskets have really taken me some time since there are eight of them. I found them at Homegoods and made some altered art fabric liners for them. I will be putting on some antique library label holders on them too. They are sitting on an old wardrobe trunk that I also found on craigslist.... but more on that later :)