Monday, December 28, 2009

Upcycled Lighting :)

Ok ... so I had two of those ugly brass light fixtures we all hate in my studio... so I painted it black since most of the furniture in there is black. It was better than that shiny brass but I still hated them!
Then I cam across these vegetable baskets in the thrift shop and I thought they looked like they would fit over those ugly lights. So I brought them home, painted them black and stuck them up there. It was better but I still did not like them much. However I thought I could tie some ribbons on the wires, hang a few crystals here and there and maybe I would like them better.


Then it came to me... I had crystal garlands in my Christmas decorations! ... Now I love them! The room just sparkles when they are lit and I get to enjoy my crystal garlands year round :)


Friday, December 25, 2009

I just had to kiss the cook!

I hope you had as nice a Christmas as we did. We had an amazing meal, visited with the family... and we had the cutest cook ever!


Friday, December 18, 2009

Club Diva's Spoon Pendant

 
As well as being a member of Artistic Souls I am also a member of Designing Diva's, an art club in the Boise area. Our super talented leader is Lynn Stevens from Trash To Treasures hosted a spoon project this last meeting. How lucky I felt to be a part of her little mini workshop! However I did not get my spoon finished : / It took me a while to get it done too because I have had my handsome little grandbaby this week. I also just noticed that Lynn has posted several of her spoons on her blog so be sure to click the link above and check out her amazing work!

Little Asian Puppet Theater

A special gift for a special friend.

Several weeks ago I picked up an old jewelry box at the local thrift shop. I loved the handles and it had 6 drawers and a door all with hardware. After getting it home and pulling all the drawers out I thought of making a little fairy theater from the shell. Well I did not quite get to it yet with the holidays and all but I did use one of the drawers to make this mini theater for a very special friend of mine. I used my dremel to expand the hold for the handle to a slot. Then I hung my little puppet on a dowel that was slightly bigger than the slot I cut. Now you can hold onto the dowle and jiggle the little puppet to make it dance. I just love it and so did my dear friend.

Friday, December 11, 2009

An Artistic Souls Christmas :)

Do you recognize the faces on those bags!


I am so fortunate to be a member Artistic Souls, a local stamping club in Eagle Idaho. We get together every month and share our art, food and fun :)) Each one of the members has so enriched my art and my life so this Christmas I wanted to do something special. I photoshoped our faces onto a vintage post card and created a faux newspaper article. Then I printed it on some vintage muslin and attached it to a canvas bag. I think I had more fun making these this past week than they did getting them. I just giggled all week long even joking with hubby how I had spent years learning how to sew a strait line and now I was having trouble sewing a crooked one...lol... But I loved how they came out and I think my friends did too :) If you would like to read our spoof article, I took a photo of it before I sewed them up. Click on the little thumb below and it will take you to a picture large enough to read.


Dead Tree Christmas Card

For the past few months one of the local stamp clubs I attend has had a round robin stamp challenge. Several months ago we each brought a stamp and each month we have rotated them so that each person has a turn with each stamp. Our sweet Judy brought a dead tree stamp and we all bemoaned our turn with it. However month by month we were amazed with what the designated person came up for it. I actually think it challenged us more than any of the other stamps as we really had to contemplate our design. We had more fun trying to come up with something different. Anyway I was last on the list and this is what I did with it. I first stamped the nest from Scrolls Work Rubber Stamps then I masked it off and stamped the Cardinal... also from Scrolls Work. Then after those were masked off I stamped the dead tree from Stamps by Judith. It does look a lot better in real life... you can't really see that the cardinal has black stickels and a seed bead for the eye. I also added white stickles here and there on the branches, in the end... I really liked it! 

Sunday, December 6, 2009

We Have A Winner!

Teabolt!
and check out the loot!

It has been a fun week, reading all the robo names as they came in. I read each post here and in my groups to hubby and we had many chuckles over them. I think the one he thougth was the funniest was being called Mr Inka :)) I gave him the list to pick from yesterday, today when "Twocan" was posted he almost changed his mind but decided to stick with his orignal choice. Thank you all for entering and congratulations to Vicki Holdwick.

Vicky if you can use the email link on my side bar and send me your mailing address I will get this in the mail :)

Sunday, November 29, 2009

Hubby's Bott & Blog Candy!!

The other day I was showing hubby Pictures of some steampunk birds that some friends and are going to get togeter and make. I also showed him some pictures of some little reclaimed robots that I wanted to make for myself too. Anyway we ended up down town so I had him stop at the thrift shop to see if they had any birds to steampunk. Before I knew it he was walking around the corner with a arm full of metal junk. Fancy tea cans, brass bowls, candle sticks, a metal string holder and such. I told him to put them back that I had to many projects on the burner and I did not have a place to store all that junk until I was ready to make one. He just huffed and me and said I could do what I wanted to do but he was getting the stuff to make himself a robot :)) I was FLOORED!! He has done some wood work around the house and honey do things for me but I have never seen him do anything you could really say was art!

 So today he got out his tools and got to work on it. He got the head done and I was just tickled it looked so cute. Then he decided he had to have a nap ... gosh was that frustrating to me :( Finally he woke up, went out to the garage and I could hear pounding and drilling and and he came out of that garage with this!!!! The hat has a bolt down the center that goes into the coffeepot innards so it comes off like a lid and I can store stuff in there. The lid that is the neck also comes off so stuff can go in the tummy too. I just love him ... yep I am talking about them both :))
 

I think he needs a name too! ... leave a name suggestion for him and I will give hubby the list of names to choose from next week. The person with the winning name will get a little goodie package :)


If you follow my blog you already know I have a hard time calling a piece finished :)) so I kept thinking about it and I really felt he needed a tea cup because his little fork finger was sticking out just how the snooty little tea tippers do. So I while I was in town I stopped by the Rusty Trunk junk shop and found this little cup! ... Then hubby bent his fingers to hold it for me :)


Wednesday, November 18, 2009

The Perfume Shop Canvas

I think I am finished but I always say that and then I seem to add or change things...lol. It is not as "artsy fartsy" as I usually do but I was trying to fit a theme I have in my bathroom. This is a rather large canvas too ... the biggest one I have ever done measuring 12" x 24". The lady is cut from an original antique print. I call it the perfume shop as the little hanging sign is a reproduction of a perfume peddlers sign.

Tuesday, November 17, 2009

Playing with rust again

I have been playing with rust again :)) I had this old bird cage and I wanted to do something with it. I thought of doing a doll but I also had the stand and I did not want to waste it. So I rusted a bird and gave it a crown. I found a little plastic couch at the thrift shop and used my rust technique on that... once it was rusted it was pretty cute. Then I just added a table, some tiny tea cups and an old coffee pot I had. Now I have my eye out for a little claw foot tub that I can rust and put on a branch up a little higher.

Friday, November 6, 2009

Bookworm Baby

I was trying to come up with a way to display my childhood baby and also I wanted to put a little of my art into my decor and this is what I came up with. I used an old clock dome I picked up at a thrift shop. Then because I collect old coffee pots I had picked up several old glass peculator tops. So I epoxied one to the top to make it look like an old garden bell... but before I did I stuck some tiny flowers and a tiny brass key charm inside. Then for the bottom I used a candle holder also from the local thrift shop. Because the feet had an Asian look I wrapped them with some brass corners I had on hand. The little top hat started life as a paper cup but once I used paper mache it and added some newsprint roses it made the perfect topper for my baby.


Wednesday, November 4, 2009

Sugar Charlotte Spoon Pendant

Just thought I would share this little spoon pendant I made a couple weeks ago. It is on a very chunky chain so it looks smaller in the picture but it is on a standard size sugar spoon. I loved the shovel shape. The rhinestones are vintage earrings and I added them by just drilling holes in the bottom of the spoon. This way I can change them out with similar earrings with colored stones to fit my mood. The shape of the spoon holds the earring posts away from my skin so no pokes either.

Sunday, November 1, 2009

Little boy lost ...

This has been a very difficult day in my house. The tears just wont stop...my little fur baby Toby turned 16 this October 31st but he has been ill for a long time. Eight years ago he had pancreatitis and we were told that he has so little of his pancreas left that he probably would not live much longer...but we made sure all his food was 97% fat free and he kept on keeping on. He was half blind and his hips caused him a lot of trouble too. He had to take pain meds everyday. When we woke up Saturday morning he wasn't doing well. We were sure that nothing had been left down he could have gotten into. So I gave him his doggie meds and waited hoping he would get better but he just grew worse. I kept him tranquilized so he was sleeping most of the time but he was so bad that I knew come Monday morning I would have to take him in to be put down. I last checked on him, gave him more meds and cuddled him up a little after midnight. When I put him back to bed he was snoring quite loud. This morning when I awoke he was gone. My heart is breaking for my little boy lost and I wonder how I will ever go on. He was so special to me because when I lost my son he was there for me. When my hubby went back to work and my other son went back to school, he was still there with all his fuzzy kisses and snuggles of encouragment. It made me go on ...for him, for my family. I do take comfort in that he is no longer suffering and I am also so grateful that I was still here. I had planned to be in California by now but thank goodness I had some medical followups of my own come up that I had to stick around for.

Monday, October 19, 2009

Molding Kewpie or Charlotte's


The other day I was working on a silver spoon necklace and I wanted to add a little antique doll. Well the doll was too big for the spoon so I decided to make one from polymer clay. After struggling with it for hours I finally got one I liked...that is when it dawned on me I could have just made a mold of one of my plastic charms to use... so I did that too. I think they came out pretty kewl. I used just regular sculpy and used hand lotion for a release agent. After buttering two slabs with hand lotion, I sandwiched the plastic doll charms between the sculpy, cut it into a cube and separated the halves of the mold. Then I baked the mold. The mold does get hard but you can use the "eraser" sculpy if you want a flexible mold. Once the mold was baked, I painted it with hand lotion again so it would release, then pressed sculpy into it leaving it heaping. I then pressed the top of the mold on and squished them together. After I removed the top I used the excess from the seam edges to lift the little doll out of the other side of the mold, trimmed the seams with an xacto knife, baked them and whala! I am watching a few charms on ebay too so if I win, I can see more molds in my future... being in the Halloween spirit I could not resist adding that little spooky pun :))

Halloween Matchbox Shrine


The other day at our local stamp club Lynn Stevens hosted this darling project. I took mine home to finish because I wanted to use this little black cat charm I had. After adding some orange rhinestones for the eyes, I called it finished :))

Friday, October 16, 2009

Cream cheese filled breadsticks


 I so love having someone to cook for and with all the company I have had this past couple of weeks, I have been doing a lot of cooking. One treat I really love is from one of the frozen pizza brands when came out with a cream cheese filled breadstick. However they are almost $6.00 a package of six : / ouch! I looked everywhere for a recipe for them to no avail so I came up with my own and actually I think my version really tastes better. Since I could not find a recipe for it online I thought I should post it.


I start with a simple bread machine recipe for white bread and I use the one for a large loaf.

1 cup plus 2 tablespoons of water
1 tablespoon butter
3 cups of "better for bread" flour (this is not self rising just ground finer)
2 tablespoons sugar
1 tablespoon dry milk
1 3/4 tablespoons salt
2 1/2 teaspoons of bread machine yeast or quick-acting active dry yeast

Place all the ingredients in the bread machine in the order listed. Set the machine for large loaf, white bread and dough only.

Once the machine has completed its work prepare the cream cheese filling. You will need,

1, 8 ounce package of cream cheese
1/3 cup granulated sugar
1 egg yolk (reserve the egg white for later)
1 tablespoon flour
1/4 teaspoon almond extract
1/2 teaspoon vanilla extract

Beat all the ingredients until creamy and set aside, remove the dough from the bread machine and roll it out as thin as you can without making holes. I got mine about 2 foot by 3 foot. Whip the reserved egg white and spread it over the entire dough. Cut the dough into 4 inch by 6 inch sections. On one side of each section pipe a rope of the cream cheese filling. Roll over and over stopping with the seam side down and the filling spiraled in the center. The egg white spread on the dough previously will seal the filling inside. Use a fork to crimp the ends together and place on an air baking sheet that has been lined with parchment paper. Let rise for about 30 minutes, brush with butter and bake at 320 fahrenheit until golden brown. Yummy served hot and will reheat in the microwave as well.

Monday, October 12, 2009

Free Printabe Potion Labels (Limited Time Offer)


This was a limited time offer and has now expired but these labels are still available at
 my little etsy store.
This week it is my turn to bring a project for my local stamp club and I chose to do some potion bottles. You really can't see the stamping to well in this picture but the bottles are stamped with spiderwebs, bats, grave stones and such.

A few ideas for filling them, I used cream of wheat for the "Organic Bone Meal" I put black food coloring and some star glitter in the "Black of Night" Fuzzy yarn for the "Wool of Bat" and so on.. have a great Halloween!

Monday, October 5, 2009

Rusty Ladies

I just had to share my latest thrift shop find... can you believe these ladies only cost me $4.50!!! Yep that's right, $4.50 for both! They had some problems though. The head had been broken off one but was still attached by a rebar that ran down through the center. The other had some hair broken off and was missing and they both had paint chipping and flaking off everywhere. So I brushed them down with a wire brush and used concrete patch to repair the broken head and sculpt some new hair. Once sanded, hubby blew them off with his air compresser and I used my homemade rusting technique on them. Aren't they fun! I think I need to make them some hats and masks... maybe some wings?

Saturday, September 26, 2009

Books in my head

Is this art? ...I just got a new cabinet to house my sewing stuff in so I was trying to organize stuff in my studio. I had several piles of stuff that needed a "place" sitting on my desk. An old wire wig form that I had gotten to put my "bad hair day doo" on, a ceramic mask I had picked up at a yard sale, a pile of little books I got to alter and some old door hardware. I stuck them all together and topped it with my "zeroith" hat that I had made for Quinton's birthday. Now I can just leave it sitting on top of the desk ... but do I want to use the parts now???????????? :))


Monday, September 21, 2009

Rusting Technique


This is not my favorite style, I am just now a western kinda gal :)) but the theme for our shoebox project at my local stamping club last Friday was fall. The only fall saying I had was kinda western so there ya go. The real reason I am sharing this card is the rusting technique I used to make the oval sayings plaque. Some time back I had purchased some metal ovals that I loved. After using them up and not being able to find them again I decided I could make some. I punched mine from matt board then I used a brown marker on the edge but they really look like metal.

Here is how ya do it! First you will need some metal filings. If your hubby has a grinder he can make you some but if not try going to the local machine shop and ask if you can sweep some off there floor. Most of them will hand you a dustpan. Then just mix about 1 part metal filings with 2 parts black acrylic paint. Now you can paint whatever you want to look like rusted metal with that. Once it is dry mix 2 parts bleach with 1 part vinegar and paint it over your entire piece. Repeat this step until you have the desired amount of rust.


Tuesday, September 15, 2009

Keeper Of Fragments

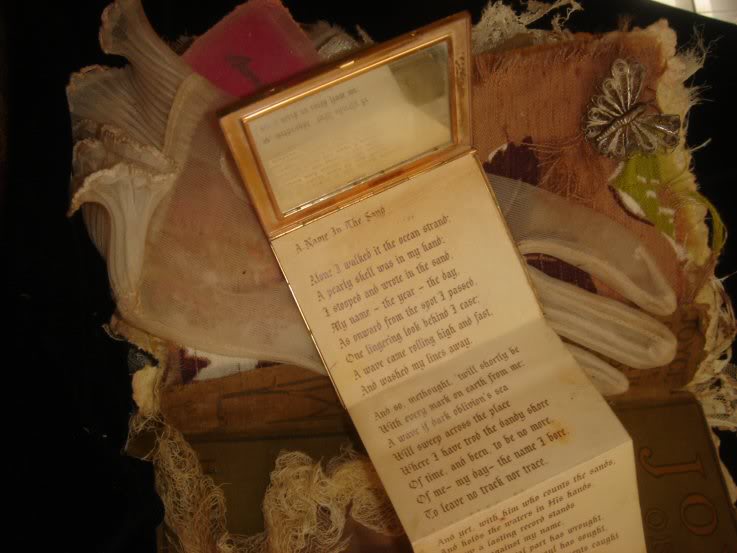
I have been busy on my book … I did a little aging on the pages I showed before and I have added a couple more pages. I deleted some the old posts so I could add the updated photos and put everything so far in one spot.

This is just inside the cover and under the little buttoned door is some special wording I added.


The lullaby page has been aged. I added the rolled up lullaby's in the pocket, and the cherub. The little butterfly pin has been replaced with the little stork pin I found in California. I still need to add some wording above the little picture of me as a baby. I think it needs to go along with the lullaby theme. Any suggestions would be greatly appreciated.

This is also a picture of me as a toddler. I just love the old Sears ad for teddy bears! It has also been aged a little and the other side is now finished. I traced a baby shoe onto leather and cut it out. Then I stitched it and aged it to look like the sole of an old shoe. I even used my dremel to make it look as though a little foot had worn its imprint into the leather.

This has to be my favorite pages so far. Since One of my favorite childhood memories is taking "naps" with my sister. As soon as my mother shut the door, out would come our dolls and we would play until we finally fell asleep. I think my mother knew we were not really napping :)) . Since I did not have any pictures of my sister and I napping I used an old post card photo and photo shopped our faces onto it. Then I printed it on photo paper and spray glued it to matt board. I think once the edges were done with a brown paint marker, it looked as good as the original. While in California I came across some little notes that my sister and I had passed during church when I was small. I plan to put a pocket under the little "sisters" mini book and tuck them inside.
This is me as a teen ... yes it is photo shopped again :)) The picture is on a hinge that folds out and the speller opens up to a faux chalkboard. If you click on the montage on the left side bar it will show that.
This is me as a young adult. The compact opens up to a lovely poem that is a play on a name. My given name is Joyce but my family call me Inka.

This is the wedding page. It features a picture of hubby and I. The little velum envelope has a marriage certificate in it. A reproduction antique of course with our real names but the witnesses are my Grandparents who are no longer with us.

This page is a tribute to love, a promise to be forever true and to always remember.


The back of the book :)


Monday, September 7, 2009

I'M HOME!

I finally made it home last week but it has been crazy week. I had so much to get caught up on but I will soon be creating again :)

Friday, August 21, 2009

Still in California!!

When I left for California on the 3rd I had hoped to be gone a little over a week but I am still here! My mom is doing much better although it was a very close call a couple of times. After spending hour upon hours at the hospital I finally decided that she was well enough for us to take some time away and I took my grand baby to the beach in Cambria. It is the town I spent my childhood so it was really special to be able to share that with my little Quinton. I would have posted an update sooner but my sisters computer is a dinosaur and it has the slowest internet connection that ever existed. It doesn’t have a port for my camera chip but I finally got to Wal-Mart and had my pictures put onto a CD.

Sunday, July 26, 2009

Where Bloggers Create


On Thursday, Karen of My Lovely Desert Cottage invited bloggers to join her blog party showing the places where we create. I really wish I had heard about it on time. I had so much fun going down the list and discovering such great storage ideas I felt I needed to give back so although I am two days late I thought I would post a few pictures anyway. So stop by her blog and also check the posts about her room. There were a lot of late comers that have posted pictures on their blogs that are not on the list :)

There is a couple of pictures taken a while back. My studio is not always so neat and right now I have a couple of projects I am working on spread all over my work surfaces. This first one is me in the left side of my studio.

This is my work table and I am facing it in the picture above.


Hubby built my work table and it features a pull out storage for my inks and findings, He even put the acrylic ink shelf on a swivel so that I can access an additional acrylic shelf behind that one. Then it rolls under the table to hide away when not in use.

The other end has a door that opens to hold my scissors and gripper punches and a set of thin drawers.


In the center I have a pull out cart that holds my stamps on acrylic shelf’s. It is made from an old TV stand found at the thrift shop. This is a picture of my acrylic stamp shelf’s when they were in the bar... we just moved them to the cart and I like it much better. Also now next to the stamps I have a roll out trash can.

In the center of the room is my desk.

It is really just a sheet of plywood held up by two bookcases and a piece of tempered glass on top. The bookcase under the desk is where I keep my computer, printer and all that junk. The bookcase on the other end holds my books, magazines, my bottle collection and embellishments I use in my art.

I use to have a bamboo blind across the entire backside but since I closed Inka Stamps I have opened a kick area and a pull out shelf to hold my laptop. Now hubby has a place to sit and visit while we play around on the internet.


Just behind his chair is my soldering station. This is an old picture when I just used it for storage but now there is a pull out shelf that has my soldering iron and tools on it. Also now that there is no Inka Stamps the shelfs behind the roman blinds are just used for storage.

This is the top of the soldering station now. Hubby wired it with a surge protector to turn the soldering iron off and on with. The little lamp you see in the picture is also plugged into the surge protector. This way if the lamp is on I know the soldering iron is on also. This really helps me not to forget to turn it off.. something I am good at :))

This is a close up of my bling and also some more jarred embellishments.

This is an old picture but across the room from that is my cupboard that I store all my fabric, ribbon and so on in. I did a post in the past about how hubby put this together for me.


I now store all my rusty art embellishments on top as well as show off some of the beautiful art I have done and received.


I use to have a plastic bin that I would throw all my paper scraps in. It was a jumbled mess and I could never find what I wanted. So I bought two of those plastic according files and removed the plastic covers. Then I covered a gift box with newspaper and placed the according part in it. Then I organized the scraps by color. Putting all the solid color scraps in the first section and textured and printed in the second according section. Matt board scraps on one end and transparencies on the other. Now I can find what I need without spending twenty minutes going though scraps.