Sunday, May 25, 2008

The last of the ATC workshop :)

I have finally completed the ATC workshop based on Bernie Berlin's book with the last two lessons 16 and 17. The first is a square tin for storing your ATC’s. I think I am going to start making one in the swap theme for each swap I am in. It is done by sanding the tin and then dry brushing on some gesso. Then you drop alcohol inks onto the tin, sprits with a little blending solution and dry it with a heat gun. Then scuff with sandpaper and stamp. The second one is a recycled tin can. This is also for storage. I might flunk this one because you are supposed to make the ATC label by embossing metal tape. I did that and I just did not like the way it looked so I peeled it off and used a metal tag to make my label. I plan to add a chain with a P38 can opener on it … the type that use to come on sea rations and can be carried on your key chain but for now, I did not want to get to far off the lesson …lol

Monday, May 19, 2008

GrandPuppies! ^.^

I got grandpuppies! The momma is a white schnauzer and the daddy is a black schnauzer. As for the puppies we now have two girls, both black and three boys, two black and one white :) There parents are just as cute as the puppies too! The past week when I fed them Baxter (the daddy) would not eat until after Sugar (the momma) ate her food and then came over and ate some of his too. I got on to her the night before they were born and told her that plate was for Baxter and while I was telling her that, Baxter pushed his plate to her, so I let her have it. When she had all she wanted he ate the rest. I think he knew she was close to delivery and wanted her to have all she wanted to eat ...lol. We put her in the laundry room to have the puppies and then after they were born he came to the gate we had place at the door. Hubby let him in and when Sugar saw him she pushed each puppy one at a time out for Baxter to see :) ...it was just precious! In the picture three of them where they should be and the other two under her bum :D

Monday, May 12, 2008

ATC workshop ... Lesson 15

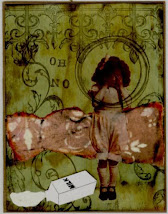
For my last ultra card I chose Journaling. This was pretty simple. I just dry brushed the card with blue acrylic paint, stamped it with gold sequence waste and edged it with gold. Glued on my collage image and used a black permanent marker to do the journaling.

ATC workshop ... Lesson 14

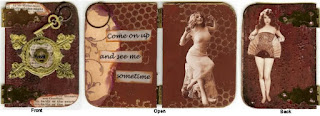
  For my second ultra card I chose to do a Diptych, I cut two pieces of thin matt board and rounded the corners on one side. Then I used the fresco technique to give it an old world look. The print came from an old dictionary and I used the references to “lady of the night” “lady of the evening” and “lady in waiting”. Added some brass hinges, a keyhole and a Dresden foil frame. The little brass key is just hanging from a spiral paperclip. Inside I stamped some sequence waste and then added some specialty paper and cutouts from a collage sheet. I printed the saying on Velum and just glued that in place. On the back I just glued on another image that had been cut from a collage sheet.

Sunday, May 4, 2008

Dream Big!

 
Just a little soldered charm to remind myself to "Dream Big"

ATC workshop ... Lesson 13 ...My ATC Shrine


The next three lessons are Ultra Cards. You can choose from Journaled, Folded, Diptych & Triptych's, Pen & Ink, Digital or special for children, I choose folded for this lesson. I am so pleased with how mine came out. Well you all know me and fold-out, pop-out or dimensional paper :)) I had to make it my own …lol. I just was not satisfied with doors that opened to reveal the image so I created this little ATC shrine. I have drawn my own pattern. I will be offering it at my little etsy store

Sunday, April 27, 2008

Here I go again :)


I have a bunch of antique cook books that I have spent many hours reading. Not only can the recipes be hilarious but also the ad’s they have. I have been wanting to start a new altered book and I decided to use one of my cookbooks for it… (I picked a pretty plain one that had a burnt spot on the cover) … anyway I thought I would scan some of my favorite ads and recipes to use in my “Altered” cook book so I could have the best of all of them in my altered cookbook. I am going to call it “A taste of life” so it is not going to be just recipes :)) This is from one of my favorite cook books called Cupids Book. It was given to the bride when the happy couple purchased a marriage license. It has some hysterical ads that are directed to the little woman by the local merchants :)) This is one of my favorites and I just had to share it!

Sunday, April 20, 2008

ATC workshop ... Lesson 10, 11 & 12

Your not going to believe this one but I think I am caught up with the rest of the class! Lesson 10, 11 & 12 only had one card each :) Lesson 10 was metal tape. You just drizzle some alcohol ink onto metal tape, sprits it with the blender fluid and let that dry. Then you tear it into pieces and stick it all over the card. Once that part is finished just emboss some of the tape and layer it on. I call mine porn star … lol. Lesson 11 was a Mica card. Once you have a couple of layers cut to the size of an ATC it is done the same way with alcohol inks. When they are dry you layer a transparency between the layers of colored mica and connect the layers with eyelets. Lesson 12 was friendly plastic. I cut mine into strips and wove them together and then melted them onto the cardstock. Then I added a circle of red in the top corner and stamped a moon face into it while it was still hot. Then I pressed in the brass dragon fly and a vintage die cut on the bottom.

Saturday, April 19, 2008

Notable

I mentioned in my last post that I had been inspired by Mary Schweitzer (Green Woman Creating) piece “Noteworthy”. I had contacted her to make sure she did not mind if I made a doppelganger of her piece and she was very encouraging. I love artists that have a desire to inspirer art. There are so many artists that are so worried that someone might use their idea that they can’t see past their own nose. I have always felt that to emulate someone’s work is a complement to them and it is refreshing to meet other artists that feel the same way :)

So meet “Notable” my version of “Noteworthy” I soldered an antique canning jar lifter to a candleholder to form most of the body, then added a vintage look hanger to that. The candle holder part now holds paperclips. I then attached the head by positioning it over the top of the jar lifter and pressing air dry clay around the top loop of the jar lifter and into the bottom of the head. This created a little bottom in the head too… forming a little cup for the pencil hair. An antique dance card pencil hangs from the clipboard that was made from a piece a rusted metal. The back of the calendar was also made from rusted metal then hung on jump rings on the canning jar body. I printed the calendar on my computer then I carefully spread some foil leafing adhesive on the top edges to create that gummy edge you see on tablets. When that was dry I used a little talc on it so the top edge was no longer sticky. Now the pages will pull off like a tablet as the months change.


Wednesday, April 16, 2008

My junky day out!


I have been talking to Mary Schweitzer about doing a doppelganger of her “Noteworthy” piece. I just loved it and wanted one for my office desk. So I headed into town to once again try and find an open doll head and some little junk for other assemblage pieces … I still don’t know my way around Boise too well so after trudging through several antiques shops and only finding niceties, I was about to give up. Then as I was headed down a street that had a bunch construction going on, I saw a sidewalk sign that said “Dusty Trunk” …Wow that sounded like what I was looking for. Sure enough it was a shop just packed full of vintage and antique junk! I found the perfect doll head, and take note of the canning jar holder next to the head in the picture … doll body???? hmmmmm :)) I also found lots of stuff for other projects too! There were tiny bottles and plastic gumball toys, keys, keys and more keys! an old box lock and wow too much to list! I am in junk heaven now so expect some pieces posted soon!

Lookie Lookie down under art!


While I was waiting in line at the post office I started thumbing through my mail and Wozer there was an envelope from Jen Crossley! I can’t tell you how honored I felt to be receiving something from her. I have been a fan of her work from the first moment I saw her blog. In fact it is her work truly changed the direction of my own. I was just fascinated by her style. I immediately had to order myself a soldering iron and start collecting junk for some assemblage pieces. I have played around with the soldering iron on a few charms but have not yet really put together a piece like I hope to yet… I did find some awesome junk yesterday so stay tuned for the next post :)) … back to my story! So I was standing there opening it and the guy in front of me was standing sideways watching me. I guess he saw my face when I pulled it out of the bubble wrap because he exclaimed ‘how cool” I of course agreed! I was soon showing it off to all my friends too! I could not have loved it more and I can't believe I actually own one of her pieces! :) Click on the picture for a closer view!


Monday, April 14, 2008

ATC workshop ... Lesson 9

I know I am wayyyyy behind but I refuse to give up :D

The first one is Hand Stitching and I actually did this one last week but with flitting off to retreat and all the preparation that took I did not get to the second one until today. The first one was done by making a little pillow complete with a touch of stuffing the same size as an ATC. Then you hand stitch around the edges. I used silk ribbon for my edges. Then I used just a regular thread and quilted it a little. Not much of that shows though because the next step was to do an image transfer and sew that on. Then I just added my little heart shaped button and a brass plaque.

The second one is machine stitching and I really like this one the best. First I sewed some beige muslin to a white ATC card with navy blue thread. Then I wet the whole thing down with alcohol and drizzled some alcohol ink on it. While that was drying, I stamped some more muslin with my newsprint stamp. Then I used a little of that to make the mountain that the little Adam and Eve are sitting on. Then I stamped newsprint on the backside of muslin that had already been stamped. I cut it in strips and sewed several down the center. I clipped both sides to the stitching and twisted it forming the newsprint fringe for across the top. Once I stamped my background it was back to the sewing machine for a little white stitching. Then I just added my little flowers and the brass plaque.

Sunday, April 13, 2008

Fabric hanger :P


Little fabric hanger ornament given away as blog candy :) 

Tuesday, April 8, 2008

Star Book from retreat


Home from retreat! and I had a wonderfully fun time! Five of us stayed in the most posh 3 bedroom suite. We stamped until the wee hours of the morning every night. It was a wonderful time of sharing and learning from some of the best artists I know! I would love to show you pictures of everything I made but I never show art when I have used other companies stamps. There are some companies that have complained even when I posted to a personal album. Some people forget that we are artist and that not everything is about sales : / It is one of the drawbacks of being an artist and having a company. That being said, on the project taught by Caroline Summers, I did stick to all my images so I would have something for my blog :) If you click on the thumb you can see a view of all the pages!

Tuesday, April 1, 2008

This little shrine of mine :)

I got my junk on! and created this altered light bulb shrine the other day. I am not sure if hubby is gonna like it much because I used the dies from his sausage grinder for the base but he has not made sausage in years! And they had become rusty anyway :)) I have it hid away in my studio so he has not noticed it yet .. and I am not pointing it out to him :D

I have had so many emails asking how I did that I put together a little online workshop My inspiration was the steampunk look. Inside the bulb is rusty chicken wire, the image is one of my front/back transparencys (instructions for front/back images are on my website). The top is a old perfume funnel and the spiral is a watch spring. I should have put the mini fairy lights inside and I might just take it apart and do that :)

Sunday, March 30, 2008

ATC workshop ... Lesson 8

I am getting caught up! ... here is lesson 8! The first one is No Sew Fabric. First transfer an image to fabric with carbon paper. Then retrace the lines with a fabric marker and color with pastels. Heat set the color and then use a little fabric fuse to attach it to a piece of felt. Then you just trim it to size. The second one is Fused Fibers. Cover your cardstock with some fusible webbing then start laying on fibers. Sprinkle with embossing powder here and there and then iron between Teflon sheets. I thought mine looked like a landscape so I added a couple little black fibers to emulate birds.

Wednesday, March 26, 2008

Serenity

My first real canvas… I have done a couple of tiny ones but this one is 8x8. I used my grandmother’s buttons and little purse. I hated to glue it but then I thought I was preserving it and that it would be where I could enjoy it too. I used the fresco technique from ATC lesson 7 and then my spackle technique too.

Monday, March 24, 2008

He Won!


Woooowhoooo! and
I want to thank everyone who voted for him :)

My son is a graphic artist and has entered a contest for the t-shirt design for the next Dukes Fest. It is important to him so it is important to me. Please help him win by taking a moment to vote for his shirt. To vote for his please choose 11. Thank you so much! I am ever so grateful!
You can visit his website too Bugsy's Junkers

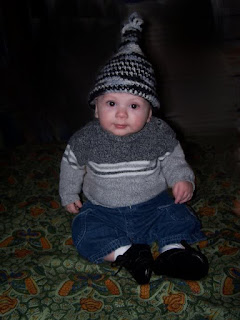
Quinton .. the cutest ever!

It has been a while since I have posted a picture of the cutest grandbaby ever! Doesn't he look like a little gnome in that hat his mommy made him!

Saturday, March 22, 2008

ATC workshop ... Lesson 7


As promised …. Lesson 7!

The first one is a resin fresco. I started with a harvest gold cardstock and then dabbed embossing ink here and there. Then sprinkled it with ultra thick embossing powder. Then it was dry brushed with gesso here and there too. Once that was dry, I painted it with a wine acrylic paint and then with a pink metallic. It was then stamped and the edges trimmed with a black permanent marker and then again with a gold paint pen. The little embellishment was made by mixing ultra thick embossing powder with a little of the wine acrylic in a bottle cap. Then I heated the bottom of the cap with my heat gun. When it was melted I stuck a stamp that had been coated with a blue metallic pigment ink into the melted stuff. When it was cool I just peeled off the stamp.

The second one is called glass like resin. I used white cardstock and dry brushed vertically with a teal paint and then dry brushed horizontal with pink. When that was dry the entire cardstock was covered with embossing ink and sprinkled with ultra thick embossing powder. While it was hot I kept sprinkling more and more ultra thick embossing until I had a deep finish. While that was still soft, it was stamped with the swirl and the little saying. Then I used a gold paint pen on the edges and some little fairies that I had cut out of my collage sheets.


The third one I think is my favorite. It is called dimensional resin. First a sheet of mica is cut the same size as an ATC. Then metal tape is used to form walls around the edges so the resin wont run off. If you have ever made a little pan out of foil it is much like that. Then I molded a raindrop in a resin mold using melted ultra thick embossing, stirring in some blue Judikins roxs with a skewer. Then I filled the mica “pan” about half way with the same resin. I sat the whole thing on a electric fry pan to keep it liquid while I worked. Then I added foil flakes at the bottom and added the embellishments. The spider web is a Dresden foil and the little face is a metal bead. Then I finished filling the little “pan” with melted ultra thick embossing and dropped my pre-molded raindrop in. When it was cooled, the metal tape was removed. Then I stamped my newsprint stamp on the back. The words look backwards from the front but they are so small you really don’t read them anyway…at least not through the resin.

Friday, March 21, 2008

ATC workshop ... Lesson 6

I know you all thought I just disappeared, and I feel awful that I am so far behind but it was unavoidable. I am going to try and get caught up, I guess it is better late than never :)) The first card on this lesson is emboss-resist. You paint a card with acrylic paint. You can use one or two colors. I used two colors … sienna and gold. Then it is embossed with clear embossing. I used my new gate stamp. Then it was dry brushed with black. I really love the technique. The second one is embossed scraps. I had some scanned money left over from another project so I tore it into several pieces. Then it is glued to the card with an excess of glue. Once the card is covered and before the glue dries, it is sprinkled with embossing powder and heat gunned, I used green glitz. There was just two for this lesson but I hope to post lesson 7 tomorrow.

Mystery Swap

This is just a little card I made for my mystery swapper. It is time for the end of this round and the reveal so I thought I could post it :)

Sunday, March 16, 2008

Caged Crow


This is a little crow in cage ornament given away as blog candy :)

Thursday, February 28, 2008

Slipping around!


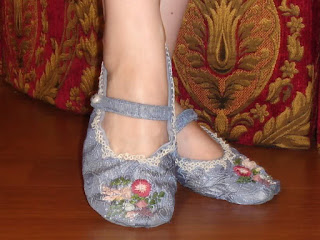
Recently, while poking around blog land I have run into several pairs of fairy shoes … well you know me and fairies … I was instantly inspired! I wanted to try and make some but I wanted to be able to wear them too! I was also motivated by a stampers retreat that our local stamp group leader has planed for us. We plan to stay in our jammies all weekend and stamp, so I needed some pretty shoes to wear … right! Well I have a book on ribbon embroidery so I got out my sewing machine followed a pattern that I found also at the thrift shop. Although I do tat I did not do the tatted lace around the edges. That is some antique lace I collected a long time back.

Tuesday, February 26, 2008

Fairy Memories


I made this card for my stamping partner in one of my clubs but she arrived in shreds :( so I thought I would give her a little memorial here so that she could live on in cyberspace :D

Wednesday, February 20, 2008

ATC workshop ... Lesson 5

I am still trying to catch up with the rest of the class but I finally have pictures of lesson 5. The first one was ink jet transfer to paper. I reversed the image because of the text on it then printed it. You were suppose to be able to use water or gel medium but I could not get the water transfer to work so I just used the gel. I painted the watercolor paper with the gel and laid the print on that. After letting it set for a minute I carefully peeled away the ink jet paper. The image was a little lighter than I would have liked so I rubbed yellow dye ink over it and that seemed to darken it up. Then I added a little gold and green ink on the edges and glued on some bellies. The second one is ink jet transfer to linen. It is done the same way. For this one after the transfer was complete, I glued it to cardstock and put a dab of mica powder here and there. Then I gold inked the edges here and there and glued on a copper charm. I don’t know what it says but it looked cool :))The third one reminds me of Hollywood and is made with fun foam shapes. You just glue shapes on then use white gesso to cover the entire card. Once dry, you dab on two colors of paint. I love the teal with the pinkish paint but I did leave a touch of the white showing through. Then I stamped it with my newsprint stamp, used a gold paint pen on the edges of the card and shapes, glued on my little “star’s” in the center of each shape and stamped some gold swirlies here and there.

Sunday, February 17, 2008

Charming


Well I have been soldering again! This charm is pendant size, a little over 3/4 an inch wide and 1 inch high not including the leaf trim, which doesn’t look at all gold on the edges. It looks silver but the lighting made it look like that in the photo. It features two images, one on the front and the other on the back.

Wednesday, February 13, 2008

Play Day!


I could not stand it anymore … I had to play with the new stamps. I wish I was able to let myself have me time and then take care of responsibilities :/ anyway these are going out tomorrow as RAK’s for a couple of ladies in one of my yahoo clubs …. could it be you? :D

Saturday, February 9, 2008

ATC workshop ... Lesson 4

I got a little bit behind last week trying to get the new stamps out but finally here is lesson 4. The first is to use phone book paper as a background with two colors of paint and wiped with a baby wipe. The second one is to wrap string around the card and paint with gesso. Then you apply layers of acrylic. I tried to get a brick wall look. The third one is to use gel medium to adhere tissue to the atc. Then paint with acrylic lightly to accentuate the texture.

Friday, February 8, 2008

Hearts in hand :)

Today was the last local stamp club meeting before Valentines day so I went with my hearts in hand :)) I wish I could remember who’s blog I saw these on but I thought it was such a great gift for a stamping friend I had to make some, besides I got to eat all the chocolate :))

Sunday, February 3, 2008

Captured Fairy Necklace

Look how tiny this little captured fairy is! This is made with my front/back images and it is a custom size….tiny! :)) The fairy itself is not translucent but tiny wings glued on its back are. This really gives it a dimensional look I made the little “Captured Fairy” tag with shrink plastic and one of my stamps with that saying. It doesn’t have liquid in it but everything is waterproof so if you would like to fill it and add some glitter you could.

Sunday, January 27, 2008

Tiny Canvas


Check out this tiny little canvas! It is 2 x3 inches! It is my first mixed media canvas so I thought I would start small …lol. Actually I just received a tiny 2 x 2 inch canvas from one of my groups and when I saw these in the art store the other day I thought I should have a little practice before I do the one I am to send in.

I have had several ask “how did I do that” so here is how that was done … LOL

First I painted it with black gesso and then the next day I painted it with one step crackle. It did not crackle though. Maybe I did not wait long enough, I can be inpatient at times :)) I had never used that stuff before so I must have done it wrong …anyway…I did not like the glossy sheen it gave so I painted it with sparkle glaze. Once that was dry I put glue on the area I wanted sky and used two colors of blue embossing powder and embossed it. Then I glued on some Judikins Spring Meadow speckles for the hillside. Then I cut out the lady from one of my photo art sheets and glued her on. The little glass circle over her face is a test cut from our circle cutter. We just got the new bits in to cut them and they will be available at Inka Stamps eventually. I hot glued the circle on and sprinkled it with foil flakes. When it was cooled, I brushed off the excess flakes and glued on the star and saying. Then I added some gold texture paint to the bottom edge and called it done.

ATC workshop ... Lesson 3

This week was magazine paper techniques. The first one you layer some images for the background and then layer slices of your composition, add a little color and finish your edges. I just sanded my edges. The second one you paint your magazine image with white gesso in a cross hatch pattern making sure to leave it a little transparent. Then you define areas with an ink marker and then add paint to alter and highlight. The last one was really cool. You just dot the image with glue here and there to define the image. When that is dry you just rub it down with Never Dull metal polish. Then you replace the color you just wiped off with pastels. I also finished the edges by brushing with a rust inkpad.

Saturday, January 26, 2008

Japanese Valentines


This is a couple of Japanese Valentines that I did as RAK's for a few of my OSA club members :)

Sunday, January 20, 2008

ATC workshop ... Lesson 2

This week we did Leafing Pen Resist, Inky Layers and Stencils. The leafing pen resist is done on watercolor paper. You squiggle some leafing pen onto the paper then paint on watercolor spreading it around with a brush. For inky layers, layer on several different papers and then paint with a glaze. Then just dab on some pigment ink smudging it around. Once that is done you use an smudge it with iridescent ink. I used Doc Martins and I loved the way it looks, however the scan really doesn’t show how nice it looks.

Monday, January 14, 2008

Valentines ornament


I used scans of two of my valentines collage sheet to create this :)

Saturday, January 12, 2008

ATC workshop ... Lesson 1


I did these for an ATC workshop I am in that is designed to get you to try different techniques every week. The first one is called Intuitive watercolor technique. The idea is to drop watercolor on paper and when it dries, use your imagination to see what forms you can make with the blotches. The secound one is watercolor on a babywipe once dry, you can put whatever art you like. I did not want to cover up the texture so I stamped on acetate and layerd it over the babywipe and added some embellishments. The third one is Lumier paints on a papertowle then stamped.

Thursday, January 10, 2008

Valentines & Chocolate


Today I made some Valentines for the ladies at my local stamp club. I killed my diet and had a chocolate bar because you just can't have Valentines without chocolate .... lol

Tuesday, January 1, 2008

Fairyland Theater


I have been working on this little theater collage sheet. It is a scan of a Tuck & Sons original. It has puppets for Puss & Boots, Beauty & The Beast, The Prince & Cinderella and The Wolf & Red Ridinghood too in the original form. I offer it in my little etsy store with my Buttercup fairy but you can request a special listing for it with the original puppets. Just click on the convo link when you get to the listing page.

Thursday, December 20, 2007

Charm & Ornament Swap

 I finally got home after making a rush trip to California because hubby's mother passed. Thank you all for the wonderful condolences. I removed the post because this is a new year and we are trying to look forward. I hope you all can understand. Anyway when we got home the Charm and Ornament Swap was in my mailbox. I loved each and everyone of them. Because time is so short and Christmas is almost here I put them on a little wire tree for now but the ones that are small enough for a bracelet will be made into a bracelet for next year

Sunday, December 2, 2007

Snowballs and Santa Claws


I figured you all are tired of seeing all my soldered ornaments so I thought I would show you some other ornaments I have been doing. I have been making the snowball for a couple of years now. I make a few more each year. First I covered Styrofoam balls with air dry clay. Then stamped snowflakes into the soft clay. Then I cut the mouth into the ball with a knife and stuck on some balls of clay for the nose and eyes. Once dry, I sprayed them with spray glue and glittered them with translucent glitter and a few flakes of fake snow. The hangers were just glued on with E600 … I love that stuff!


Santa Claws
This was made with a pattern I designed. I used white card stock for the basic lantern. Then I stamped it with holly and sprayed it with spray glue and glittered it with translucent glitter (gotta sparkle for Christmas) then I used red stickels for the berries and glued on some holly leaf confetti for a little extra glitz. I then hung a little Santa dog inside :)